


How to Make a Sticker
Feb 10th 2022
How to Make decals with a Vinyl Cutter (Beginner’s Guide)
Making single-color vinyl stickers (or decals) is a fun hobby and can even grow into a small business. Whether you want to create personalized gifts, decorate your home, or sell custom designs, the process is simple once you know the tools and steps.
What do I need to Make a Sticker?
What do I Need to Make a Sticker?
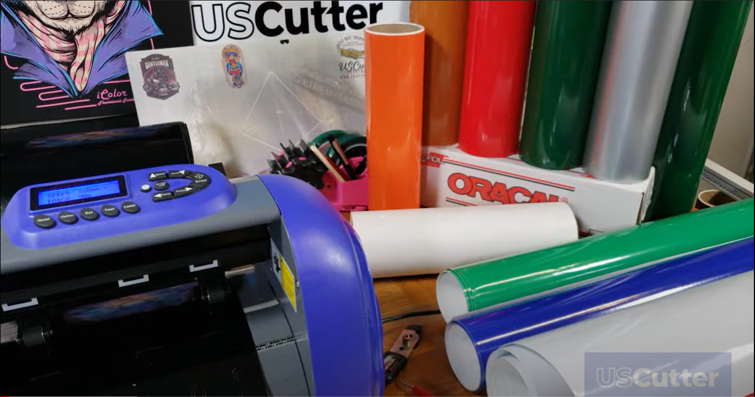
Before you get started, gather these essentials:
What Vinyl Cutter Should I Use to Make Stickers?
A vinyl cutter (also called a vinyl plotter) is the most important piece of equipment you’ll need to make stickers. This machine connects to your computer via USB or Wi-Fi, receives your design file, and uses a drag knife to cut your design into adhesive vinyl with precision.
Popular Vinyl Cutter Brands for decals
When choosing the best vinyl cutter for stickers, you’ll find options for every skill level and budget:
- USCutter Machines – Affordable and beginner-friendly models like the MH Series, SC Series, LaserPoint, Titan, and PrismCut.
- Titan – Known for ease of use and versatility, popular among crafters.
- Summa , Graphtec Professional-grade vinyl cutters designed for high-volume sticker production.
How to Choose the Right Vinyl Cutter
With so many options on the market, deciding on the best vinyl cutting machine for stickers can feel overwhelming. To help, here’s a simple breakdown based on your needs and experience level:
1. Beginners & Hobby Use and Small Business or Growing Shop
If you’re just starting out or making decals as a hobby, choose a compact vinyl cutter that’s affordable and easy to use or If you plan to sell custom decals, you’ll need a machine that balances cost with reliability.
- USCutter – Great for beginners who want more design flexibility.
- Titan – Offers precision cutting without the professional price tag.
2. Professional & High-Volume Use
For large sticker orders and commercial production, a professional-grade vinyl cutter is essential.
- Graphtec – Industry favorite for speed and reliability.
Pro Tip: When choosing a vinyl cutter for stickers, consider:
- The size of decals you want to make.
- Your budget and growth goals.
- Whether you need a long-term, heavy-duty solution.
If you’re still unsure reach out to our support team for personalized recommendations.

Software for Creating Stickers
To make stickers with a vinyl cutter, you’ll need sticker design software that connects your computer to the cutting machine. This software takes your digital artwork and converts it into a format the cutter can read, sending precise cut instructions to the blade.
Popular Sticker Design Software
Different vinyl cutter brands come with their own design and cutting programs:
-
SCAL (Sure Cuts A Lot) – Beginner-friendly, flexible, and widely compatible with many cutters.
-
FlexiSign – Industry-standard software for advanced design and production
Why Use VinylMaster for decals?
One of the biggest advantages of VinylMaster is its wide compatibility. Even if you own a cutter from another brand, VinylMaster supports most vinyl cutting machines, making it a versatile choice for anyone creating stickers.
Pro Tip: When choosing sticker-making software, look for features like vectorization tools (to convert images into cut-ready files), text editing, and pre-made clipart libraries. These save time and ensure smoother cutting results.
Tools for Creating and Applying decals
To successfully make and apply vinyl stickers, you’ll need the right sticker-making tools. These make the process faster, cleaner, and ensure professional-looking results.
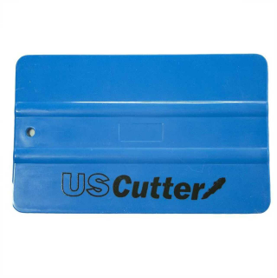
1-Squeegee – A flat plastic tool used to apply transfer tape and press your sticker onto a surface. It removes air bubbles and helps edges stick securely.
2-Weeding Tools – Picks, tweezers, and burnishers designed to peel away unwanted vinyl after cutting. These make it easier to remove small details and keep your design clean.
Pro Tip: Always weed your design on a flat, well-lit surface. This reduces mistakes and makes tiny details easier to spot.
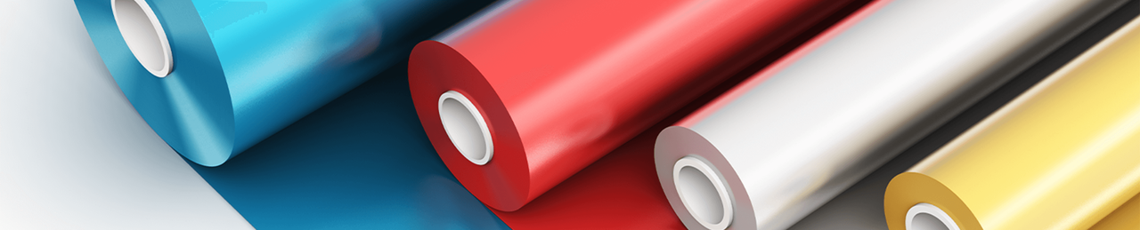
Materials to Make decals - Adhesive Vinyl
When it comes to sticker making, adhesive vinyl is the core material. The type of vinyl you choose will determine how long your stickers last and what surfaces they can be applied to. Here are the most popular options:
Greenstar Outdoor Vinyl
- Best for: Beginners and budget-conscious crafters.
- Use Case: Durable enough for outdoor signs, decals, and long-lasting decals.
- Available in: Multiple sizes and colors.
Oracal 651 – Premium Outdoor Vinyl
- Best for: Professional sticker makers and outdoor use.
- Features: Industry-standard vinyl with a 6-year permanent adhesive.
- Use Case: Ideal for car decals, storefront signs, or any outdoor project.
- Available in: Wide range of sizes and colors.
Oracal 631 – Premium Indoor Vinyl
- Best for: Removable, temporary, and interior projects.
- Features: 2-year application life with a safe, water-based adhesive.
- Use Case: Perfect for wall decals, seasonal decorations, and event graphics.
- Available in: Multiple widths, lengths, and colors.
Pro Tip: When choosing between removable vs permanent vinyl, think about where your sticker will be applied. For long-term outdoor use, go with Oracal 651 or Greenstar Outdoor. For wall art or temporary designs, Oracal 631 or Greenstar Indoor are the safest options.
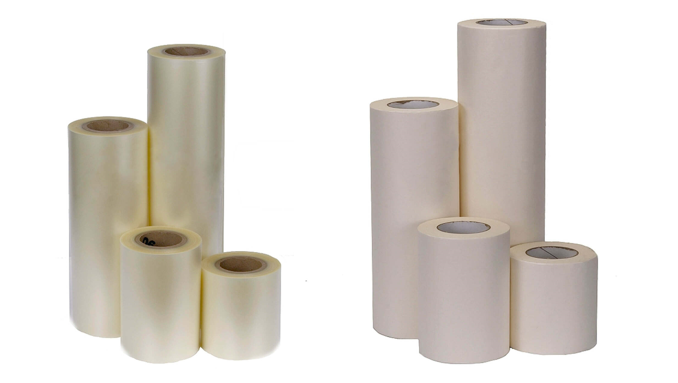
Materials to Make decals – Transfer Tape
Once your vinyl sticker is cut and weeded, the next step is applying transfer tape (also called application tape). This adhesive material allows you to lift your design from the vinyl backing and place it neatly onto your final surface without distortion.
Types of Transfer Tape
- Features: Transparent, making it easy to align designs accurately.
- Adhesive Strength: Generally more aggressive than paper tape.
- Limitations: Not suitable for the “wet application” method due to its material makeup.
Best for: PPrecise placement when you need to see your design clearly, and layering multi-color designs.
2-Classic (Paper) Transfer Tape
- Features: Opaque, with a feel similar to masking tape.
- Adhesive Strength: Medium tack, easy to handle.
- Advantages: Required for wet applications, where water is used to position the vinyl before sticking.
- Best for: Large decals, wet applications, or projects requiring repositioning.
Popular Transfer Tapes
Greenstar, Oratape, TransferRite and RTape
Artwork for Making Stickers
The artwork is the most important part of creating a sticker, and often the most challenging step for beginners who aren’t graphic designers. Your cutter needs vector artwork (not pixel-based images like JPGs or PNGs) to ensure smooth, cuttable lines.
Where to Create or Import Artwork
You can create or edit sticker designs using professional software such as:
- Adobe Illustrator – Industry-standard vector design software.
- Felxi – Professional-grade design and cutting software, ideal for business and production use.
- VinylMaster – A versatile program included with many USCutter machines, with built-in shapes, text, and clipart libraries.
- SCAL (Sure Cuts A Lot) – Easy-to-learn and budget-friendly, perfect for hobbyists and beginners.
If you’re not comfortable designing from scratch, don’t worry! You can also:
- Import existing logos or simple images and convert them into vectors.
- Purchase pre-made vector clipart for decals (SVG, EPS, or AI files).
- Use free vector resources online (just make sure you have the proper license for commercial use).
Pro Tip: When searching for artwork, always look for SVG files for vinyl cutters. These are ready-to-cut and require little to no editing.

How to Make a Sticker?
Here is a list of the steps we will go through to make a sticker. Please note we will go into each section individually.
- Importing Artwork
- Loading Material in Your Vinyl Cutter
- Performing a Test Cut
- Sending Your Design to be Cut
- Weeding your Design
- Applying Transfer Tape
- Applying Your Sticker
Importing Sticker Artwork
When making a vinyl sticker, choosing the right design is just as important as cutting. With VinylMaster Software, you can easily import artwork, create custom designs, or use built-in shapes, logos, and clipart to bring your idea to life.
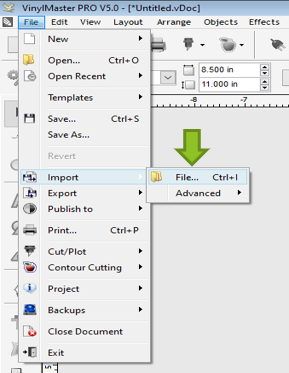
Importing files into VinylMaster is simple:
1-Drag and drop your image directly into the workspace, or
2-Go to File → Import → File and select the design you want to use.
Why Vectorizing is Important
Most imported files (like JPGs or PNGs) are pixel-based (raster images) and can’t be cut directly. Your vinyl cutter requires vector artwork with smooth paths it can follow.
Vectorizing converts pixel edges into cuttable vector lines, ensuring clean, professional sticker cuts.
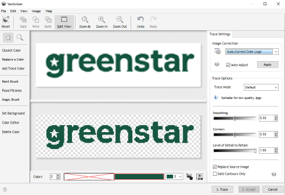
How to Vectorize an Image in VinylMaster
- Select your image by left-clicking on it.
- From the contextual menu, choose Vectorize.
- In the Vectorizer tool, adjust the trace settings to refine your design.
- Click Trace, then Accept to finalize.
Now your image is in a cut-ready vector format and ready for your vinyl cutter.
Pro Tip: Whenever possible, start with SVG files for vinyl cutting. They are already vectorized, saving you time and ensuring smoother cuts compared to raster images.
Loading Sticker Vinyl in Your Vinyl Cutter
Properly loading vinyl into your cutter is essential for clean, accurate cuts. The material is guided through the machine by feed rollers and held in place with pinch rollers, which keep the vinyl aligned as the blade moves.
Step 1: Position the Vinyl
- Place your vinyl sheet or roll into the cutter tray.
- Align the material so it feeds straight through the machine.
Step 2: Lock Down the Pinch Rollers
- Make sure at least two pinch rollers are locked down on the vinyl (usually near the edges).
- More pinch rollers can be used for extra stability, especially on wider sheets.
- If a pinch roller isn’t aligned with a feed roller, it can cause jams or uneven feeding.
Step 3: Adjust for Smooth Feeding
- Some cutters may not pull vinyl directly from a heavy roll. In that case, give the vinyl slack so the motors don’t struggle.
- Always double-check that the vinyl moves freely before cutting.
Step 4: Set the Origin Point
- Use the cutter’s origin point setting to choose where your design will begin cutting.
- This ensures your design is centered and makes the best use of material.
Pro Tip: Every vinyl cutter model is slightly different. For advanced adjustments like pinch roller positioning or feed calibration, always refer to your Vinyl Cutter’s User Manual.
Performing a Test Cut
Before cutting your final design, it’s always best to run a test cut. This ensures your blade depth, cutting pressure, and speed settings are properly adjusted.
How to Perform a Test Cut
1-Access the Test Cut function from your vinyl cutter (see your user manual for exact steps).
2-The cutter will make a small shape (often a square with a triangle inside).
3-Weed the test shape to check how easily the vinyl peels away.
Adjusting Settings
- If weeding is difficult → Increase blade pressure slightly.
- If the vinyl doesn’t cut cleanly → Adjust the speed or blade depth.
- If the blade cuts through the backing paper → Reduce blade depth and/or pressure immediately.
Pro Tip: A perfect test cut should remove the vinyl cleanly while leaving the backing paper intact.
Sending Your Sticker Design to the Cutter
Once your test cut looks good, it’s time to cut your actual sticker.
How to Send Your Design in VinylMaster
- Option 1: Go to File → Cut/Plot → Send to Cutter.
- Option 2: Click the Send to Cutter icon (looks like a blade holder).
Important: Do not turn off or disconnect your cutter during the process. Wait until the cut is fully completed before handling the vinyl.
Weeding Your Sticker Design
Once your vinyl has been cut, the next step is weeding, the process of peeling away the unwanted vinyl to reveal your finished design. This step is crucial for making your sticker look clean and professional.
How to Weed Vinyl decals
1-Start at the corners – Use a weeding pick, tweezers, or another tool to lift a corner of the excess vinyl.
2-Peel slowly at an angle – Gently pull back the vinyl, keeping the angle low to avoid lifting parts of the design.
3-Watch for small details – Letters, dots, and fine lines can easily pull up, so go slowly around intricate areas.
4-Remove inner pieces – Use a fine-point tool to pick out centers of letters (“O,” “A,” “R”) or other enclosed shapes.
Tips for Successful Weeding
- Always weed on a flat, well-lit surface to see fine cut lines.
- Pull steadily, not too fast, to avoid tearing thin vinyl pieces.
- Keep in mind that the back of the excess vinyl is sticky, if it falls back onto your design, it may ruin the cut.
Pro Tip: Investing in professional vinyl weeding tools makes the process easier, especially for intricate designs.
Applying Transfer Tape to Your Sticker
Transfer tape (also called application tape) is used to lift your sticker from the backing paper and apply it to your chosen surface without stretching or misaligning the design.
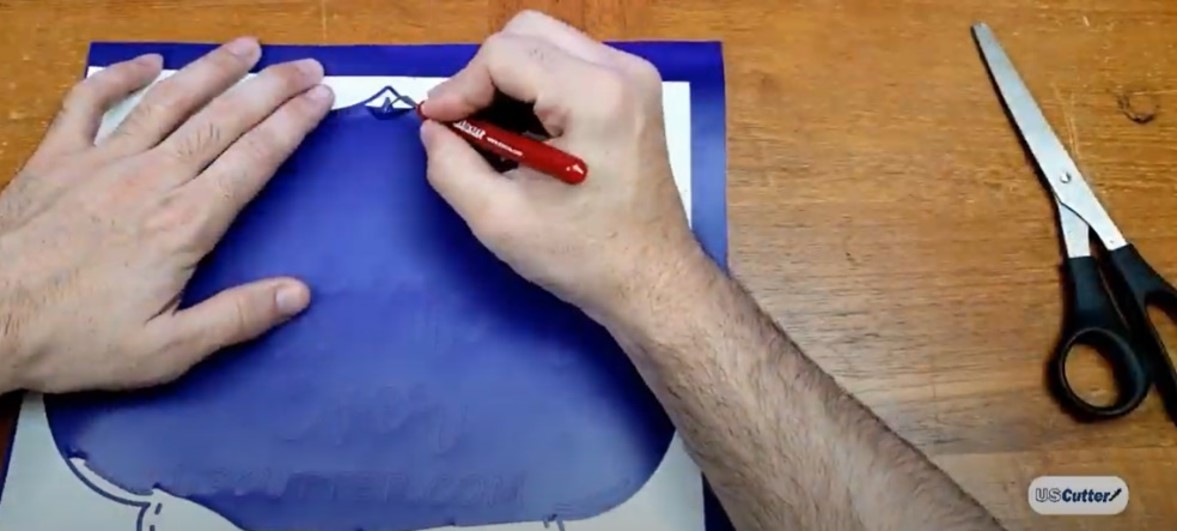
Step-by-Step: How to Apply Transfer Tape
1-Cut the transfer tape – Trim a piece large enough to fully cover your sticker. If your design is wider than the tape, you can overlap multiple strips.
2-Position the tape – Hold the tape above your sticker so it naturally curves into a “U” shape.
3-Apply from center outward – Gently lower the tape onto the vinyl, letting it fall naturally. This helps prevent wrinkles.
4-Smooth with a squeegee – Starting at the center, use the edge of a squeegee to press outward toward the edges with medium pressure. This removes air bubbles and ensures the tape sticks evenly to your design.
Tips for Success
- Always apply transfer tape on a clean, flat surface to avoid dust or debris sticking under the tape.
- Use firm, even strokes with the squeegee, too much pressure can stretch thin designs.
- For larger designs, it may help to have a second person hold the transfer tape while you smooth it down.
Pro Tip: Clear transfer tape works best when you need precise alignment, while classic (paper) tape is better for wet application methods or larger decals.
Applying Your Sticker to a Surface
Now that your sticker is weeded and transfer tape is applied, it’s time to place it on your chosen surface. This step is where precision matters most for a professional finish.
Step-by-Step: How to Apply a Vinyl Sticker
1-Lift the transfer tape – Start at one edge and slowly peel the transfer tape away from the backing paper. Your vinyl sticker will come off with it.
2-Position the sticker – Align the design on your surface before pressing down. (Clear transfer tape makes this easier.)
3-Apply from the center outward – Place the sticker onto the surface, then use a squeegee to press outward toward the edges. This removes air bubbles and helps the vinyl stick evenly.
4-Seal the edges – Apply extra pressure around the edges of the design to ensure a strong bond.
5-Remove the transfer tape – Slowly peel it back at a sharp angle, leaving the vinyl design stuck to the surface.
Tips for Best Results
- Make sure the surface is clean, smooth, and dry before applying your sticker. Dust, grease, or moisture will prevent good adhesion.
- For larger decals, tape the design in place first (hinge method), then peel and apply in sections.
- If bubbles remain, use a pin to release the air and smooth it down with your squeegee.
Pro Tip: For curved or textured surfaces, use a heat gun or hair dryer on low heat to soften the vinyl slightly. This makes it easier to press the sticker into place and ensures better adhesion.