

How to Use Heat Transfer Vinyl
Feb 23rd 2022
How to Use Heat Transfer Vinyl
Creating and decorating garments with Heat Transfer Vinyl or HTV is a great way to start a small business, or create your own unique style! Spice up old clothing, or create unique one-of-a-kind gifts, and décor. With the use of Heat Transfer Vinyl, you can give old garments new life, or take a simple design and apply it to a hundred shirts, the possibilities are endless!
What do I need to apply Heat Transfer Vinyl onto clothing and fabrics?
Here you will find a list of all the tools, equipment, and materials needed to start cutting and applying Heat Transfer Vinyl designs onto t-shirts, shorts, leggings, garments, and other fabrics!
What Equipment do I need to Apply Heat Transfer Vinyl?
What Software do I need to Cut Heat Transfer Vinyl?
What Tools do I Need to use Heat Transfer Vinyl?
Materials - What is Heat Transfer Vinyl?
How do I get Artwork for Heat Transfer Vinyl?
What Equipment do I need to Apply Heat Transfer Vinyl?
Vinyl Cutter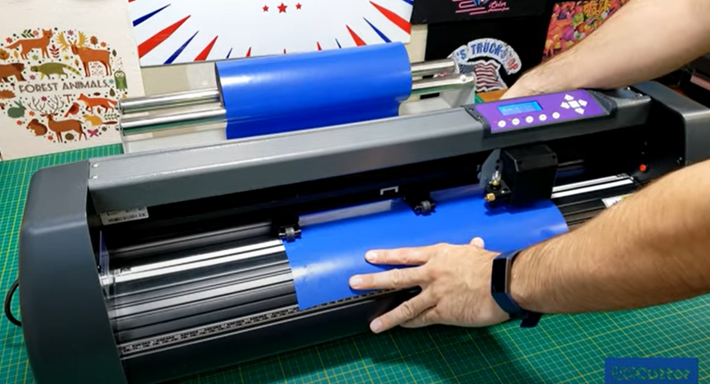
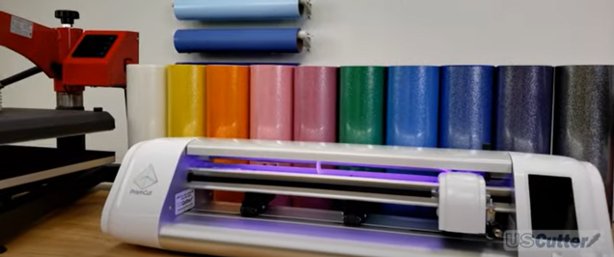
You will need a Vinyl Cutter to get started. Vinyl
Cutters are pieces of equipment that connect to your computer via a USB cable
or Wi-Fi in some cases. The vinyl cutter receives cut file information sent
from software installed on your computer, and then using a drag knife will cut
the chosen design into the heat transfer vinyl.
There are many brands available to choose from including USCutter
branded vinyl cutting machines including the
MH
series
, SC
Series
, LaserPoint, Titan, and PrismCut series to
other brands including
Silhouette Cameo, Roland, Graphtec and Mimaki. With so many
variations from small craft and desktop style vinyl cutters to large format
machines, choosing the correct one can be a tough decision. We recommend
reviewing our
Buying Guide or reaching
out to our Sales team if you need assistance or have questions regarding vinyl
cutter selection.
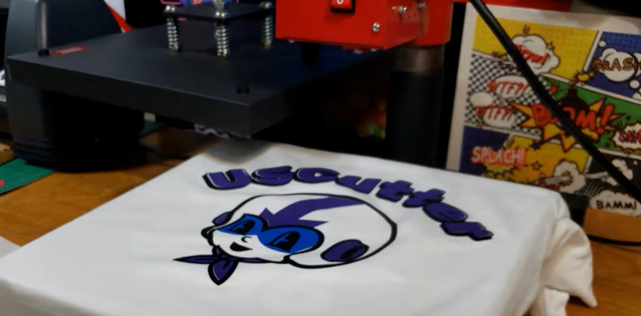
Heat Press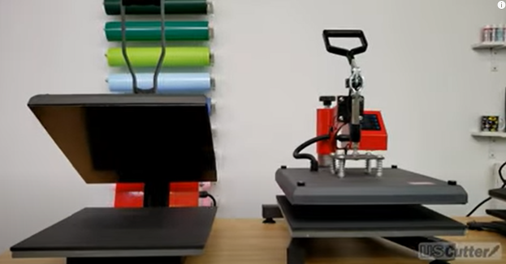
To activate the adhesive on Heat Transfer Vinyl in
order to apply it to fabric, you will need to use a
Heat Press or a
Household Iron. It is recommended to use
a heat press to guarantee proper heat and pressure distribution across the
design. While it is possible to apply
most Heat Transfer Vinyl with an Iron, it will take longer as you do not have a
digital temperature read out, or the added pressure of a piece of equipment. Be
prepared to use a lot of elbow grease to apply pressure to ensure the edges of
the material seal properly.
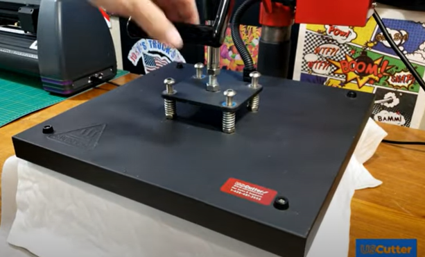
 When looking at Heat Presses, there are a lot of options such as Auto-Opening
or Manual Opening and styles like
Clamshell, Swing-Arm, and Multi-Purpose. For this
post we will be focusing on the two main types of heat presses
Clamshell, and Swing-Arm. These names
refer to how the heat press opens and closes, as well as lateral mobility.
While certain applications recommend
Swing-Arm over Clamshell heat presses,
for the purpose of applying Heat Transfer Vinyl either will work.
When looking at Heat Presses, there are a lot of options such as Auto-Opening
or Manual Opening and styles like
Clamshell, Swing-Arm, and Multi-Purpose. For this
post we will be focusing on the two main types of heat presses
Clamshell, and Swing-Arm. These names
refer to how the heat press opens and closes, as well as lateral mobility.
While certain applications recommend
Swing-Arm over Clamshell heat presses,
for the purpose of applying Heat Transfer Vinyl either will work.
Often times choosing between a Swing-Arm or Clamshell Heat Press comes down to available space. Clamshell heat presses are more compact and only open vertically. While Swing-Arm heat presses open vertically, but the top plate can be moved left or right so it is not directly over the bottom plate. This comes in handy when laying out your garment, and placing the design as it opens up the work area as opposed to a Clamshell Heat Press whose opening is tall in the front, but very short in the back and those not paying attention may touch the top platen with their knuckles which can result in a slight burn.
What Software do I need to Cut Heat Transfer Vinyl?
In order to create and cut a heat transfer vinyl and apply artwork, you will need a method of sending your digital designs to the vinyl cutter from your computer.
There are many different design and cutting programs. VinylMaster is the PC
based software that USCutter provides with its branded cutters. Silhouette,
Roland, Mimaki, and Graphtec all provide their own software interface when
purchasing a cutter.
It is important to note that all of the vinyl cutters listed are compatible
with the VinylMaster software; which is what we will be using in this tutorial.
What Tools do I Need to use Heat Transfer Vinyl?
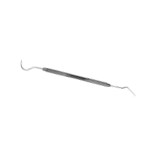 There are a
variety of
weeding tools from dental
picks, tweezers, and burnishers. These tools are used to remove excess material
away from your design once the vinyl cutter has completed cutting the Heat
Transfer Vinyl.
There are a
variety of
weeding tools from dental
picks, tweezers, and burnishers. These tools are used to remove excess material
away from your design once the vinyl cutter has completed cutting the Heat
Transfer Vinyl.
View SISER’s branded line of heat transfer tools and accessories
here!
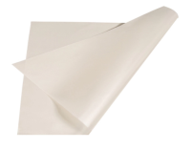
Non-Stick Sheets for Heat Presses are great for both fabric and heat press protection for any type of heat transfer. The Non-Stick Heat Resistant sheet protects the fabric and the press while still allowing heat to transfer the design.
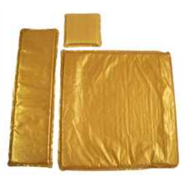
Heat Pillow prevents marks on transfers and vinyl letters from zippers, buttons, rhinestones, and thick seams. Press transfers or vinyl onto jerseys without the transfer adhesive sticking to the back of the jersey through the mesh.
Heat Resistant Tape is the perfect accessory to mark positions for your material, or to hold items in place when pressing. Capable of withstanding temperatures of up to 400°F.
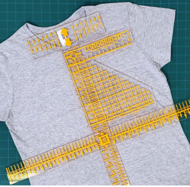
Graphic Alignment System ensures that your placement is perfect every time. No off center or lopsided applications! A must have for garment decorators of all experience levels.
Materials - What is Heat Transfer Vinyl?
 Heat Transfer Vinyl is a material
that can be applied to fabrics such as Cotton, Polyester, Poly Blends, Lycra,
Spandex, Canvas, and even Leather. There are many types and styles of Heat
Transfer Vinyl that will help you create eye catching designs on clothing and
fabrics. Let’s look at a few brands of HTV.
Heat Transfer Vinyl is a material
that can be applied to fabrics such as Cotton, Polyester, Poly Blends, Lycra,
Spandex, Canvas, and even Leather. There are many types and styles of Heat
Transfer Vinyl that will help you create eye catching designs on clothing and
fabrics. Let’s look at a few brands of HTV.
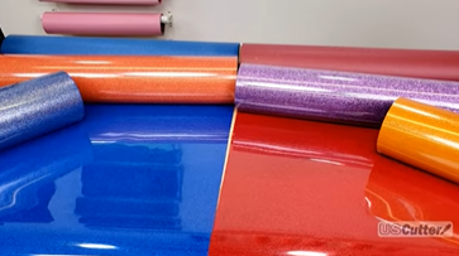
The most trusted brand in HTV is SISER, a premium vinyl brand that offers a wide array of colors, sizes and styles of HTV. With product lines such as Glitter, Twinkle, Electric, Stretch, Holographic,Glow in the Dark and more; the design options are never ending.
 Crush HTV is a brand of
HTV exclusive to USCutter. Offering excellent value and available in the most popular colors and
sizes.
Crush HTV is a brand of
HTV exclusive to USCutter. Offering excellent value and available in the most popular colors and
sizes.
How do I get Artwork for Heat Transfer Vinyl?
Artwork is the
most crucial part of making a design for clothing and other fabrics, and one of
the more difficult parts of the process for those who aren’t graphic artists.
Artwork can be imported from a variety of programs including Corel, and
Illustrator.
You can view and purchase pre-made vector clipart
here!

How to Cut and Apply Heat Transfer Vinyl?
This is a brief List of Steps for Cutting and Applying Heat Transfer Vinyl to a Garment or Fabric.
How to Import Artwork for Cutting and Applying Heat Transfer Vinyl?
How to load Heat Transfer Vinyl into a Vinyl Cutter?
What Speed and Pressure do I use to cut Heat Transfer Vinyl?
How to cut Heat Transfer Vinyl with a Vinyl Cutter?
How to Weed Heat Transfer Vinyl?
How to Apply Heat Transfer Vinyl with a Heat Press or Household Iron?
How to Care for Your Heat Transfer Garment?
How to Import Artwork for Cutting and Applying Heat Transfer Vinyl?
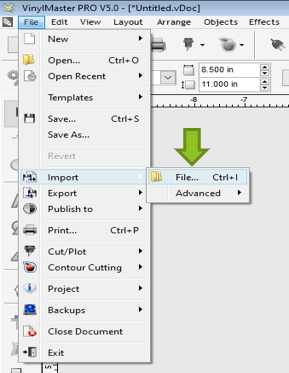
When creating a Heat Transfer Vinyl Garment with vinyl choosing the right design is important. Within the VinylMaster Software you can import artwork, create designs, access logos, basic shapes and some built-in clipart and editing tools to assist in creating your perfect sticker. Importing an image file can be as easy as drag-and-drop, or use the File Menu, and then select Import, and then File option. Then select your file to be imported.
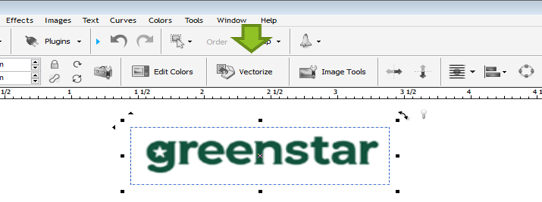 Most imported files will be pixel based, and thus need to be converted or “Vectorized”. This
process takes square pixels and converts them to cuttable smooth lines. To
Vectorize your image first left-click on the image to select it, and in the
contextual menu select the Vectorize button.
Most imported files will be pixel based, and thus need to be converted or “Vectorized”. This
process takes square pixels and converts them to cuttable smooth lines. To
Vectorize your image first left-click on the image to select it, and in the
contextual menu select the Vectorize button.
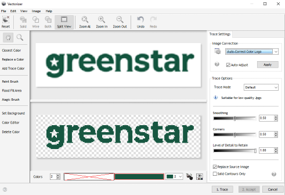
In the Vectorizer there are various options, to adjust your image. To continue, click
on the Trace button, and then click Accept. Now your image is in a cuttable
format.
Please Note: Heat Transfer Vinyl Requires that you Mirror the design when
cutting since you are technically cutting on the backside of the vinyl. You can
Mirror the image here, by selecting Arrange, and then Mirror & Rotate, and finally Mirror Horizontally. You can also select the Mirror option on the
Send to Cutter window.
How to load Heat Transfer Vinyl into a Vinyl Cutter?
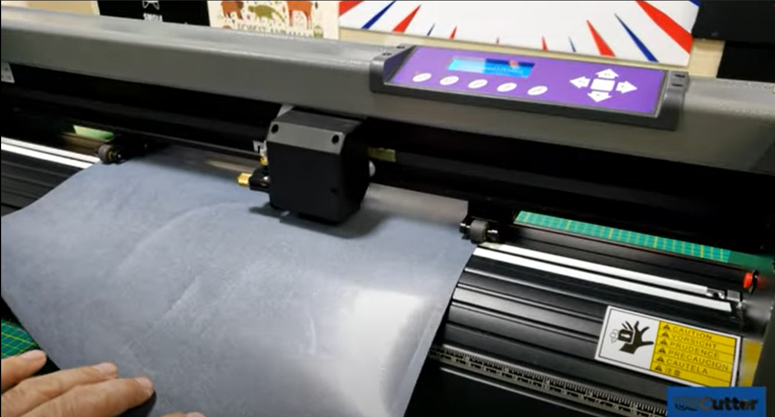
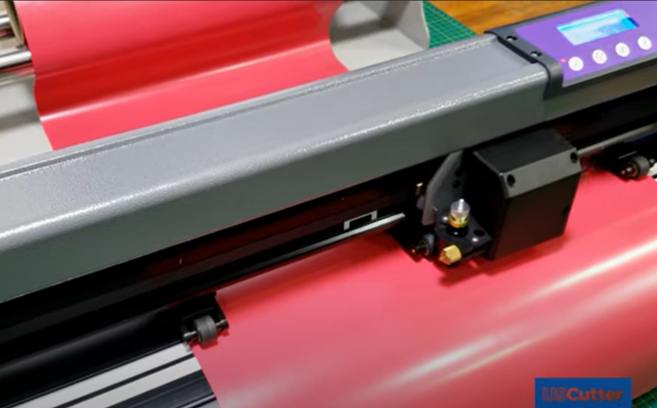
Material placed in the vinyl cutter is controlled by the movement of the feed rollers and the pinch rollers which lock the material in place. Certain cutters such as the Titan, LaserPoint and PrismCut series have very specific feed roller locations and therefore have very specific pinch roller locations. If the pinch rollers are locked down on a location that is not a feed roller, it can prevent smooth motion of vinyl through the machine. Some feed rollers are not strong enough to pull directly from rolls of vinyl, and in some cases, you will want to give the vinyl slack to make sure the motors can pull the material smoothly.
There isn't a "correct" location to place your vinyl; just make sure there are at least two pinch rollers locked down on it (generally near the edges), with more pinch rollers increasing stability. You can use the cutter's origin point setting to start cutting from any location. For more detailed instruction please refer to your Vinyl Cutter’s User Manual.
For Heat Transfer Vinyl, you will notice there is a clear layer that sits on top of the vinyl. This layer is meant to be face down when cutting. In short, when cutting Heat Transfer Vinyl ensure the Shiny Side is Down.
What Speed and Pressure do I use to cut Heat Transfer Vinyl?
To determine the best possible Speed and Pressure settings to cut Heat Transfer Vinyl, it is recommended to perform a test cut to check your Vinyl
Cutter’s Pressure and Speed settings. Please refer to the User Manual for your
Vinyl Cutter to learn how to perform a test cut.
After performing a test cut, verify that the settings are proper for smooth
weeding. If this is not the case you can make adjustments to blade, pressure,
and speed until the test cut pulls properly.
If the blade goes through the backing of the material, it is an indicator that
you will need to reduce those settings.
How to Send a File to Cut Heat Transfer Vinyl with a Vinyl Cutter?
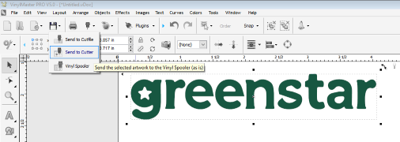
In VinylMaster you can either select File > Cut/Plot > Send to Cutter or the Sent to
Cutter icon (blade holder).
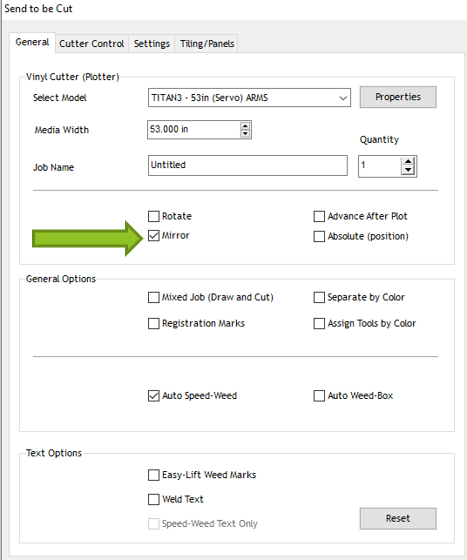
Note: if you have not Mirrored your design before cutting, be sure to select the Mirror option, otherwise your design will be backwards when applied.
his will begin the cutting process. Please do not turn off the cutter, or disconnect it from your computer until the cutting has completed.
How to Weed Heat Transfer Vinyl?
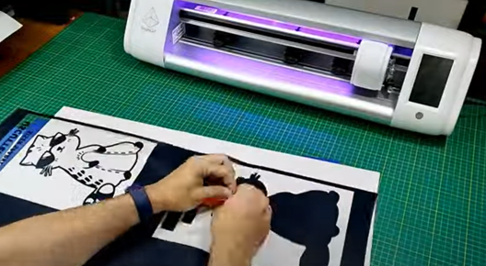
Weeding is the process or removing excess vinyl to reveal your freshly cut sticker design. This process is greatly aided with professional weeding tools available here.
Heat Transfer Vinyl is easier to weed than Adhesive Vinyl as the adhesive is only activated when heat is applied. Also note that most HTV has a sticky backer that makes weeding easy, however some materials have a pressure sensitive release liner that does not have an adhesive to hold material when weeding.

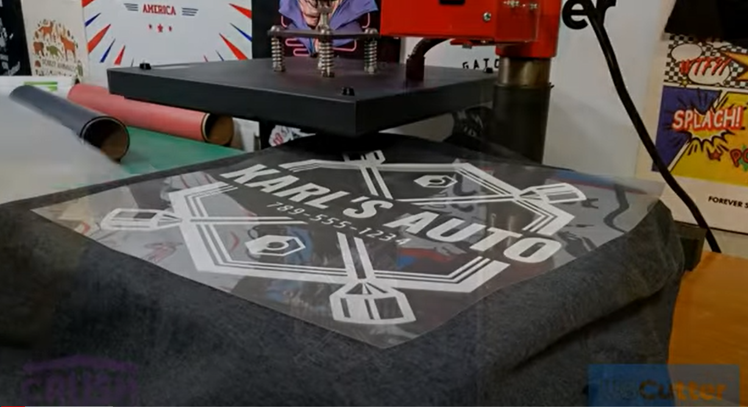
How to Apply Heat Transfer Vinyl with a Heat Press or Household Iron
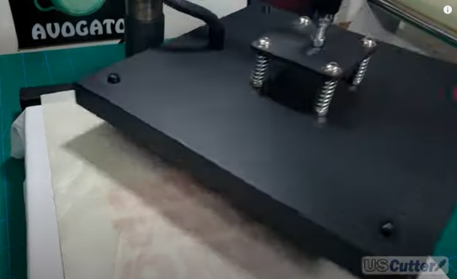
With a Heat Press
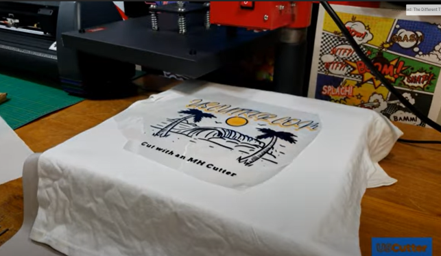
All varieties of HTV will have application instructions available on their product page. In general, most HTV will apply at 320°F when pressed for 20 seconds with Medium Pressure. First set the Time and Temperature settings on your heat press appropriately and allow the heat press to reach temperature before placing your fabric in the press. Next apply your design onto the garment. Note that you can lift and adjust the design as much as you need until heat is applied. Once you are satisfied with placement and alignment, close the heat press and secure the handle into the lock position. After the timer reaches 0, carefully open the press and remove the plastic liner from the fabric, and remove the fabric from the heat press to reveal your completed garment.
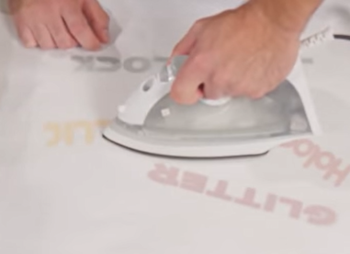
With an Iron
Most HTV can be applied with an iron, however the process is more involved than with a heat press. First ensure there is no water in the iron, if there is water empty the water storage container. Second set the iron temperature between Cotton and Linen, and allow the iron to reach temperature. Next apply your design onto the garment. Note that you can lift and adjust the design as much as you need until heat is applied. Once you are satisfied with placement and alignment, cover the design with a non-stick heat resistant sheet and hold the iron in place for 20 seconds in once spot applying medium pressure on a hard flat surface. DO NOT USE AN IRONING BOARD AS IT MAY COLLAPSE FROM THE PRESSURE NEEDED TO APPLY THE HTV.
How to Care for Your Heat Transfer Garment?
Here are a few tips for caring for your HTV decorated fabric to ensure that you get the longest life from your product.
If the fabric has been pre-treated, or is not pre-shrunk, please wash and dry the fabric 3 times before applying HTV.

Do not wash for 24 hours after applying vinyl. The adhesive in HTV is activated by heat. Once you press the material the adhesive heats into a liquid and bonds to the garment. Washing within the first 24 hours can degrade the adhesive and not allow the bonding process to complete.


Do not dry clean or use fabric softener. Dry Cleaning and fabric softener use contain solvents that can destroy the adhesive bonding the HTV to the fabric, causing warping, bubbling, and removal of the vinyl.

Wash and Dry inside out. Whenever possible wash and dry the garment inside out as friction against other items in the wash can scratch of damage HTV.


Wash on Cold and Dry on Low – High temperatures can affect the look, and life cycle of HTV applied to fabrics. Washing and drying using low temperatures will ensure a long-lasting application.
Do not iron the HTV directly after applying. This can melt the material and cause it to stick to your iron.